Implement VMware Skyline for vSphere
In this post I will describe how to install VMware Skyline by deploying Skyline Collector in your datacenter. If you don’t know, Skyline is a cloud-based proactive support platform. At the moment of writing, support for these products are available: vSphere, NSX, vSAN, vRealize Operations and Horizon. You should also know, that when you have active Production Support or Premier Services subscription, Skyline is included!
To read more about Skyline, visit: https://www.vmware.com/support/services/skyline.html
If you don’t know Skyline I would definitely recommend to try it in Hands-on Lab: HOL-2015-01-SDC at:
https://labs.hol.vmware.com/HOL
Tip here: after creating your temporary account within the lab, open Skyline Advisor in your local browser using this account.
Basically, architecture of Skyline is quite simple: at your datacenter a running Skyline Collector gets configuration and operations-data and send it to VMware cloud services. There, Skyline Advisor provides a web front-end to view inventory and proactive findings. To implement Skyline, steps at cloud and on-prem has to be done. My step-list includes steps with just numbers. These tasks are done on cloud services. Steps including a letter are done on-prem – at Collector.
Preparation for implementation:
- Get your my.vmware.com account to login to VMware cloud services.
- Prepare new password for appliance users: admin, root.
- Define IP address of Collector appliance. Appliance needs internet access (if necessary, a proxy can be configured) to:
- vcsa.vmware.com (port 443)
- vapp-updates.vmware.com (port 443)
- Create new user for vCenter access. User needs special permissions in vCenter. More information you can find in KB 59661. For short:
- Duplicate Read Only Role. Add privileges for:
- Global.License
- Global.Diagnostics
- Global.Health
- Global.Settings
- Assign new user to this role on vCenter layer.
- Duplicate Read Only Role. Add privileges for:
Steps to activate Skyline and to deploy Collector
- Log in in cloud services https://cloud.vmware.com/skyline and press Get Started.
Use your my.vmware-account that is used for license and support registration. - Create an organisation. Select shown address if suitable. If Continue-Button is still grayed out, add a new address.
- Step 1 – Associate Support Entitlement
Press the button to do what it’s name is.
Successfully done.
- Step 2 – Download Skyline Collector
In this step you download the collector appliance as OVA file.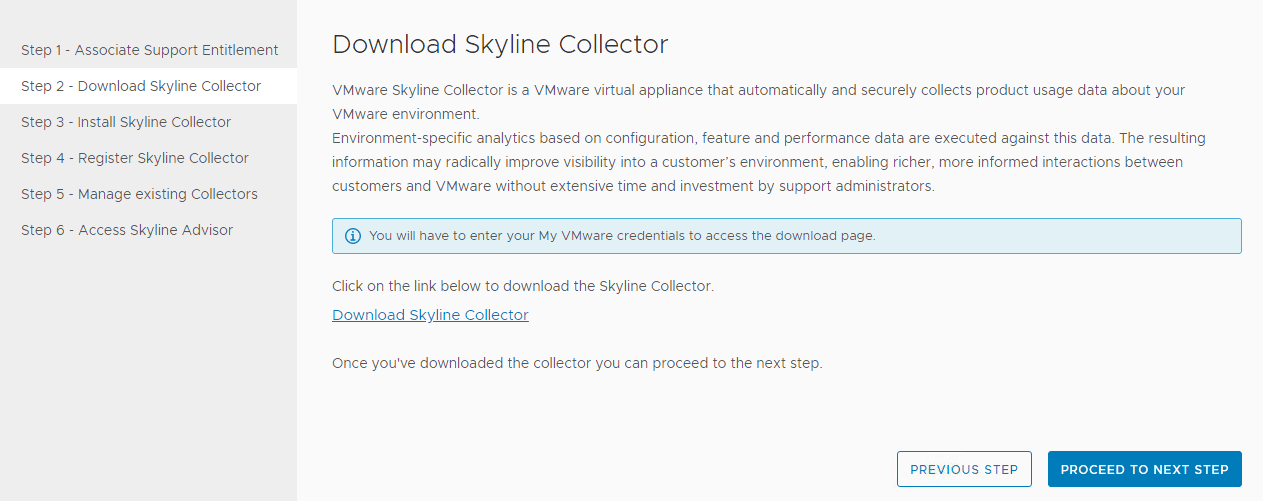
- Step 3 – Install Skyline Collector
Here you have to deploy OVA file.
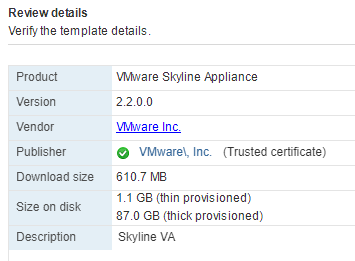
- Step 3A – Import OVA by running OVF deployment wizard in vCenter. These steps should be clear, so I will not discuss it here. Here are Review details at the end of the wizard – for size information.
- Step 3B [on-prem] – Initial Configuration of Skyline collector appliance.
Openhttps://address_to_collectorin browser and logon using useradminand passworddefault. New password for user admin must be set here. When password is set, network connectivity must be tested. At this point a proxy server can be configured.
When everything works fine, you can go on.
When your firewall intercepts SSL traffic, you will get this error:
[In text:sun.security.validator.ValidatorException: PKIX path building failed: sun.security.provider.certpath.SunCertPathBuilderException: unable to find valid certification path to requested target]
To resolve the issue, exclude Collector appliance from SSL interception. - Step 3C – Read about CEIP
- Step 4 [cloud] – Register Skyline Collector
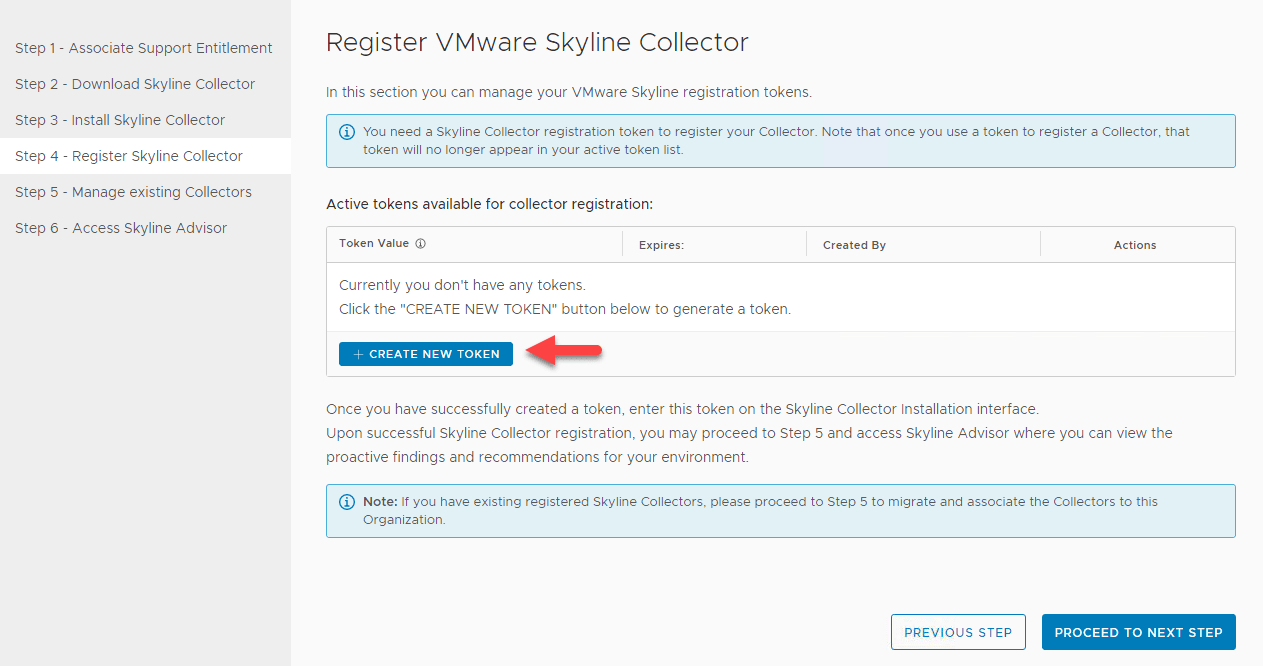
Create a new token, for linking your Collector to Skyline Advisor.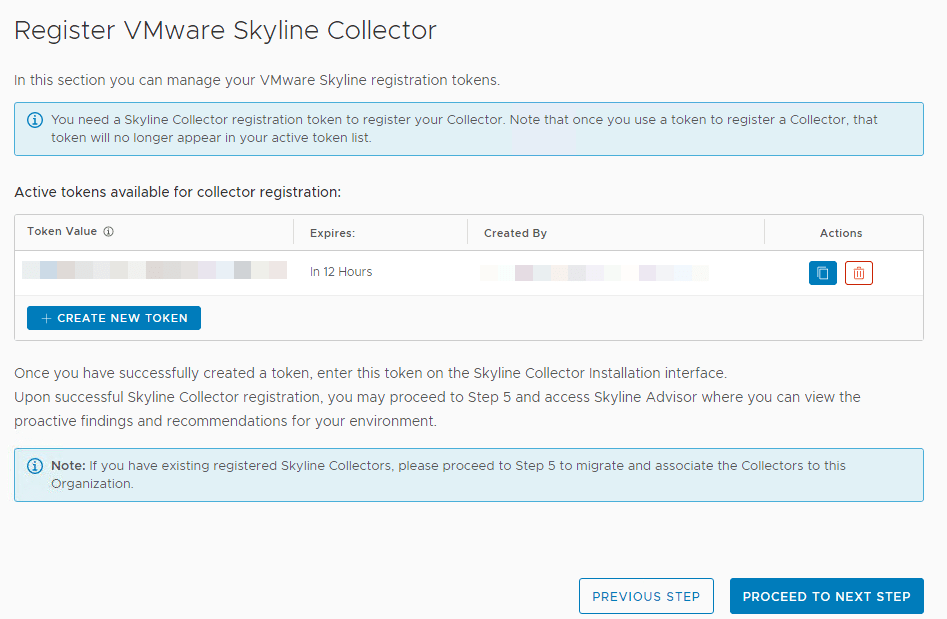
Copy token to clipboard. - Step 4A [on-prem] – Collector Registration
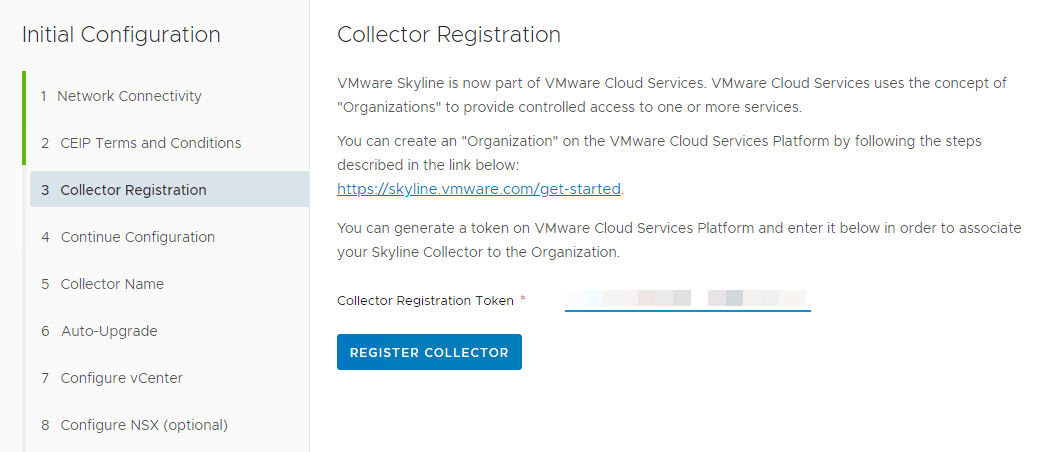
Paste token into Collector Registration Token in Collector Initial Configuration wizard. And press Register Collector.
- Step 4B – Continue Configuration
Wizard just informs you about next steps.
- Step 4C – Collector Name
Choose a name that lets you know from which environment this Collector gets its data from.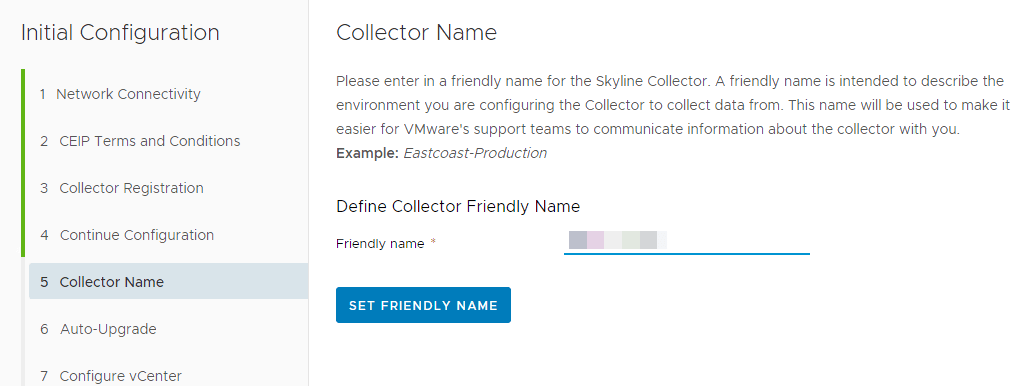
- Step 4D – Auto-Upgrade
Here you can choose if Collector should upgrade itself when a new version is available.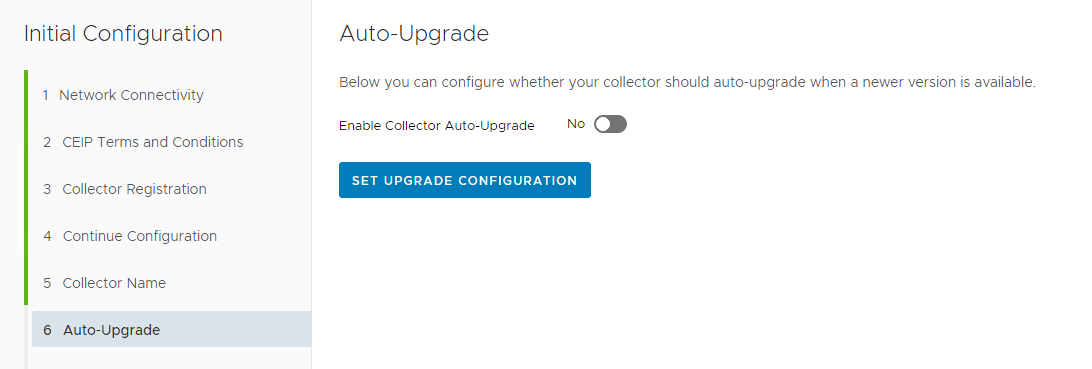
- Step 4E – Configure vCenter
Enter vCenter address and user credentials for new user (see preparation) to read data from vCenter. And – if necessary – accept certificate.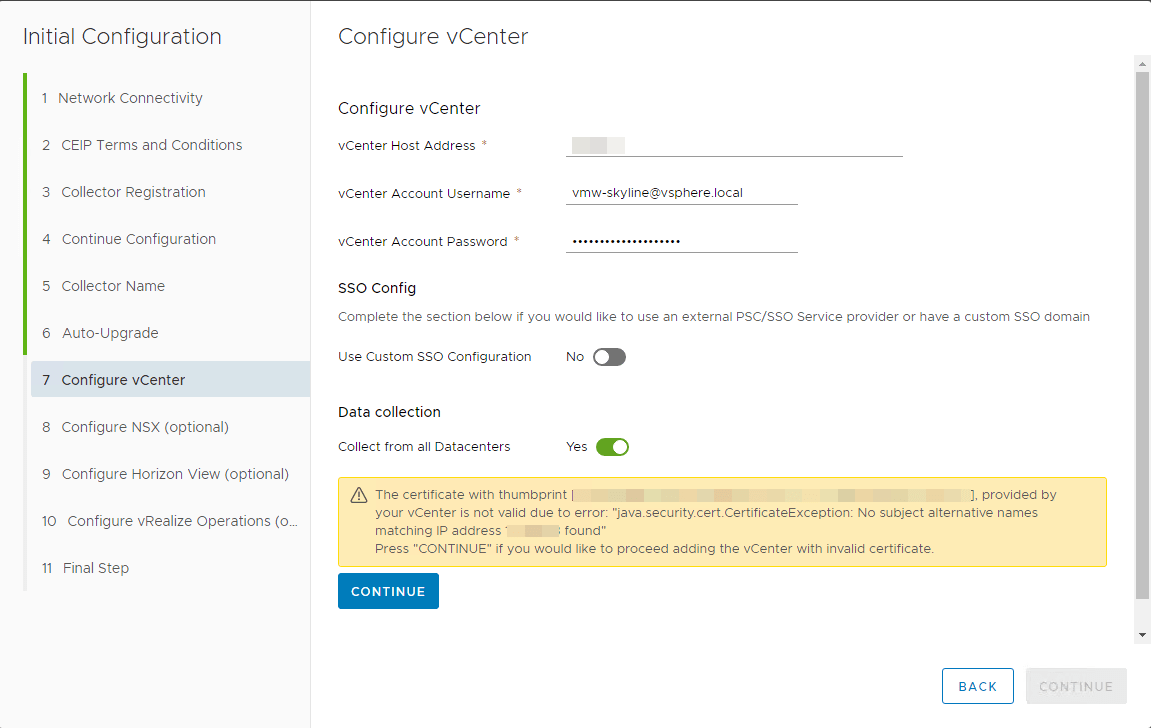
When your credentials are wrong, or your user does not have required permissions, you get this error.
- Step 4F,G,H (optional) – Configure NSX, Horizon View and vROPs
- Step 4I – Final Step
See new Skyline endpoints. Click Finish. - Step 5 – Manage existing Collectors
You should see your newly deployed Collector within 5 minutes. Compare Collector IDs.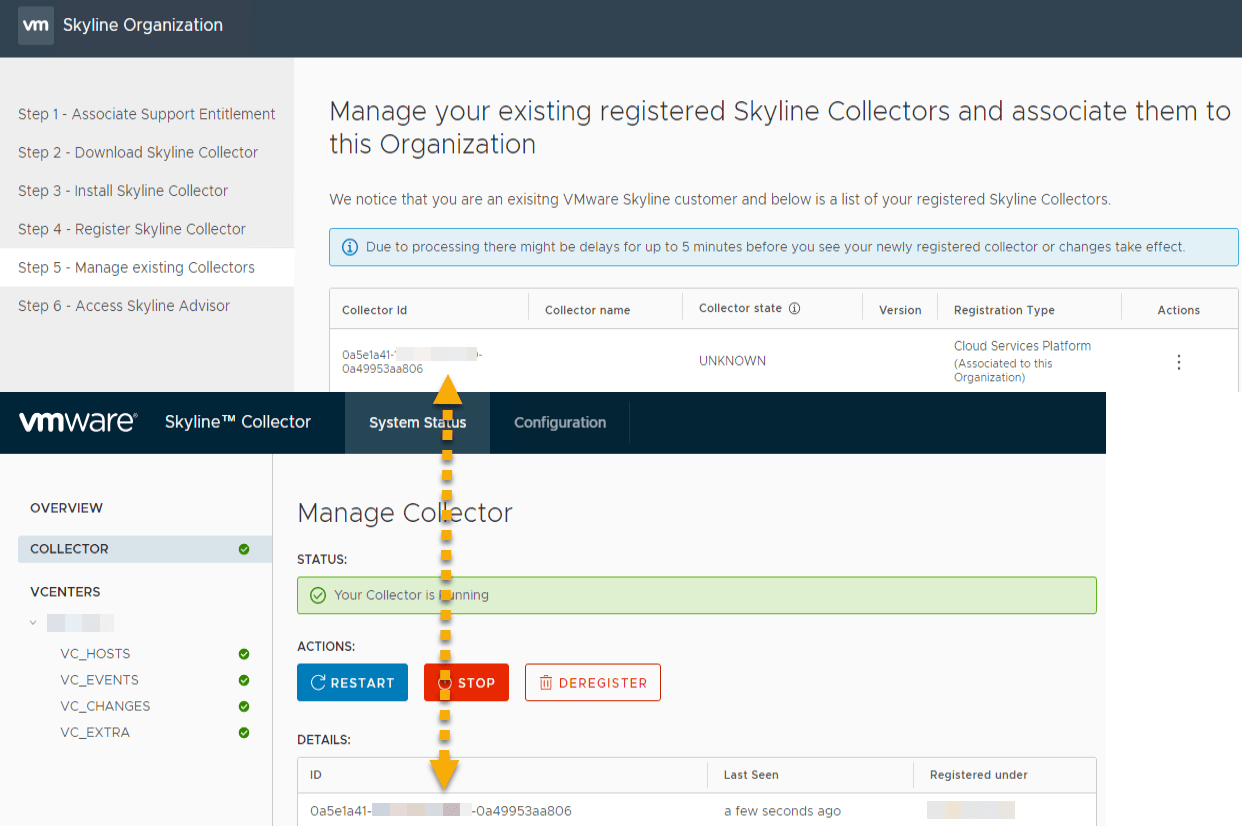
After work
Now you can logon to your Advisor. Keep in mind, it can take up to 48 hour your new Collector gets status active and you see your environment and proactive findings. If your Collector shows status inactive – also marked in red – wait for a few hours and check later again.

Notes
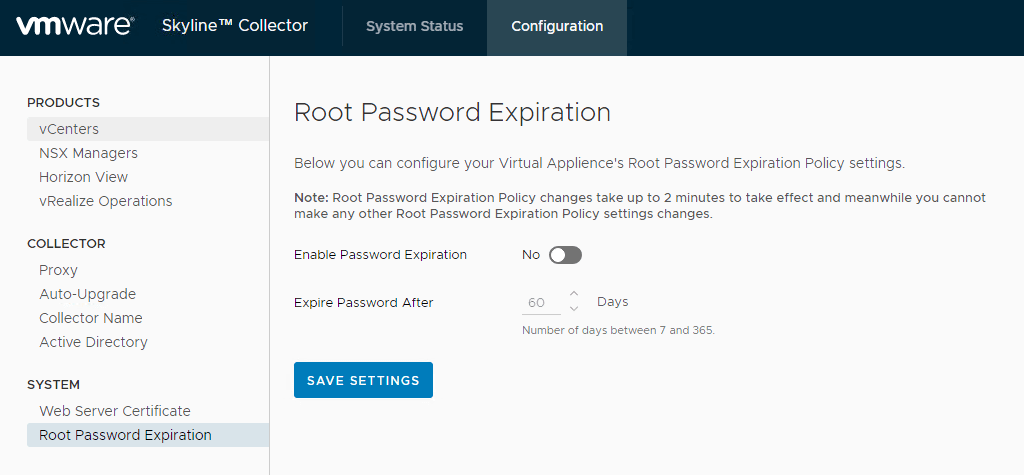
- By default, password of user root of Collector appliance expires. You can disable expiration: Login to Collector –> Configuration –> System –> Root Password Expiration
- If you have any problems during deployment, consult Skyline-community for help:
https://communities.vmware.com/community/vmtn/skyline/overview

