Mount HP Blade enclosure DVD on VMs

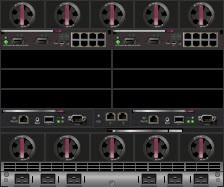
Mounting a HP BladeSystem enclosure DVD drive on a VM sounds easy. And it is, but it is not that easy as I thought first. Technically it is a USB drive for the host, but it is not possible to pass through the device as a USB drive. This post describes the steps to take for windows VMs (tested for Windows 2008 and 2012), but this should also work for other OSs.
To mount a CD/DVD into a VM
- Insert disk in CD/DVD-Rom drive of Onboard Administrator (OA) module.
- Use OA to connect enclosure DVD to blade server that is running ESXi host that is hosting your VM.
- USB device should now be shown in Storage Adapter as USB Storage Controller in ESXi Configuration. The Controller is named like vmhba34. Identifier of the device is named like mpx.vmhba34:C0:T0:L0
- Edit Settings of VM
- Add SCSI Device
- SCSI Device: CD/DVD HP
- Virtual Device Node: I prefer to use an own virtual SCSI adapter for this device, so I select SCSI(1:0). Of course, this address must be unused!
- Windows Configuration
- Check for new hardware in Device Manager
- At first connect, the device is shown as HP Virtual DVD-ROM SCSI CdRom Device under Other devices.
- Install driver: Default CD-ROM driver
- Browse my computer for driver software –> Let me pick from a list of device drivers on my computer –> Select Common hardware types: DVD/CD-ROM drives
- Select Manufacturer: (Standard CD-ROM drives) and Model: CD-ROM Drive
- Confirm Update Driver Warning
- Browse your new CD-Drive
To unmount a CD/DVD
Especially the first step should be done to avoid a lot of path-errors in vmkernel.log.
- Remove SCSI Device from VM
- Remove Enclosure DVD from ESXi host in OA
- USB Storage Controller should be removed from Storage Adapter in ESXi Configuration. If not Rescan/refresh Storage Adapter.
- Optionally check
vmkernel.logon the ESXi host to see if the device is removed properly.


